
Visual Social Proof (UGC)
Visual Social Proof (UGC)
Turn the photos and videos your customers and your social accounts already produce into shoppable social proof on your storefront. Part of the TrustShop widget family.
Why UGC
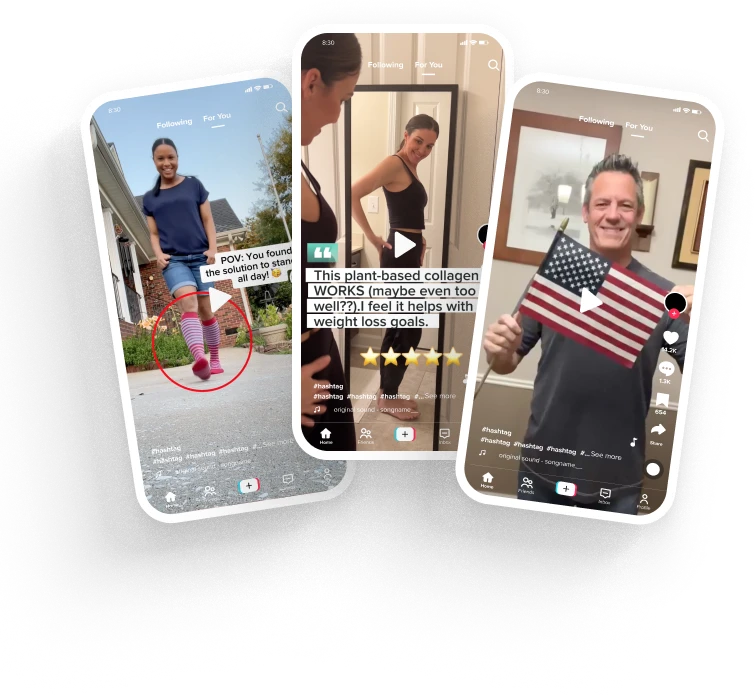
Shoppers trust other shoppers. A product page with a star rating tells someone that other people bought the product; a video of a real customer wearing it tells them what it actually looks like — the fit, the color under real light, the size next to a real body.
That gap is where most carts are abandoned. Product photography answers "what does the brand say this is?" UGC answers "what do people like me say this is?"
UGC widgets close three specific gaps:
- Uncertainty before purchase. Video shows scale, texture, and fit in a way studio photos cannot. Fewer unanswered questions means fewer abandoned carts and fewer size-related returns.
- Content you already own but never surface. Customers send photo and video reviews. Your Instagram and TikTok accounts post daily. On most storefronts none of it appears where the buying decision happens.
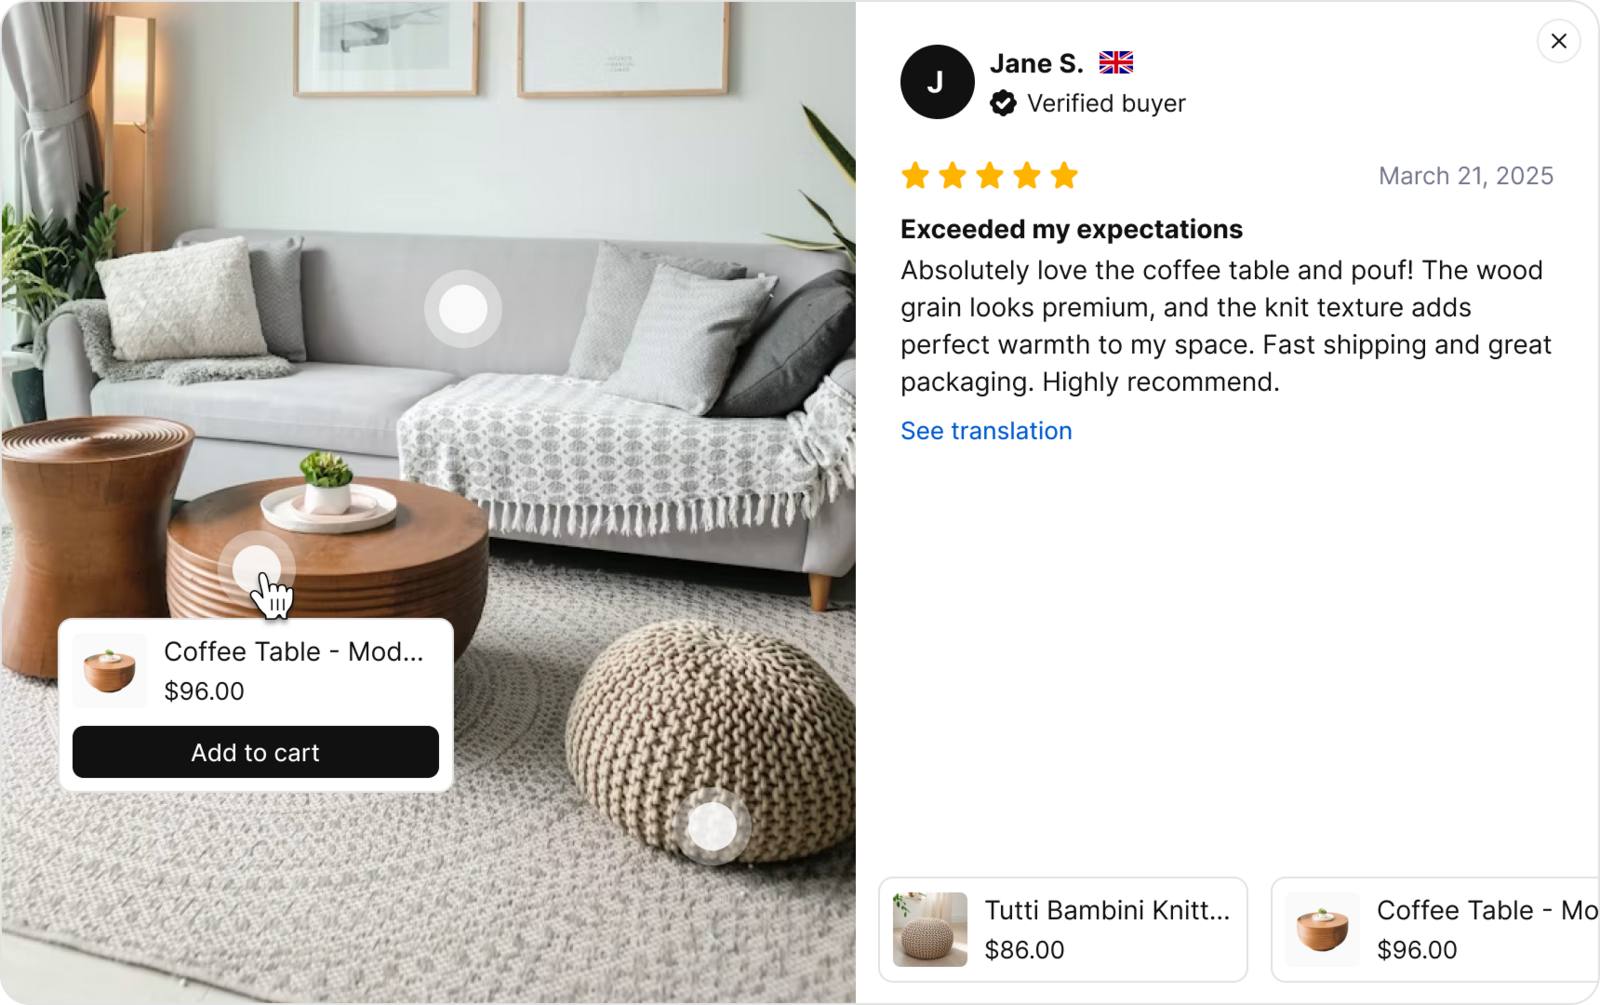
- Social proof that doesn't sell. A wall of testimonials builds trust but leads nowhere. UGC widgets attach products directly to the content, so a shopper who is convinced by a video can add to cart without leaving it.
Core concepts
The module is three steps: collect content → build a widget → show it on the storefront.
1. Collect visual UGCContent comes from two places:
- Customer reviews. Photos and videos already attached to reviews collected through the Reviews module. Nothing extra to set up — the media is already yours, with the reviewer's permission.
- Your social accounts. Connect the store's Instagram or TikTok account and pull in posts, reels, and stories. Managed from Integrations.
Both sources feed the same content library, so a single widget can mix a customer's unboxing video with a post from your own account.
2. Create a widgetPick a template, choose which content appears, attach the products each piece of content should sell, and style it. A live preview reflects changes before you save.
3. Show it on the storefrontWidgets are added to your theme as Shopify theme app blocks. TrustShop places the block for you and you choose where it sits.
Shoppable content
The step that separates UGC from a plain gallery: each piece of content can carry the products it features. A shopper watching a video sees product cards over it — name, price, add to cart — and buys without breaking the moment.
Attach products while configuring the widget. Content with no products attached still displays; it just isn't shoppable.
Main workflows
Create a UGC widget- Open UGC and click Create.
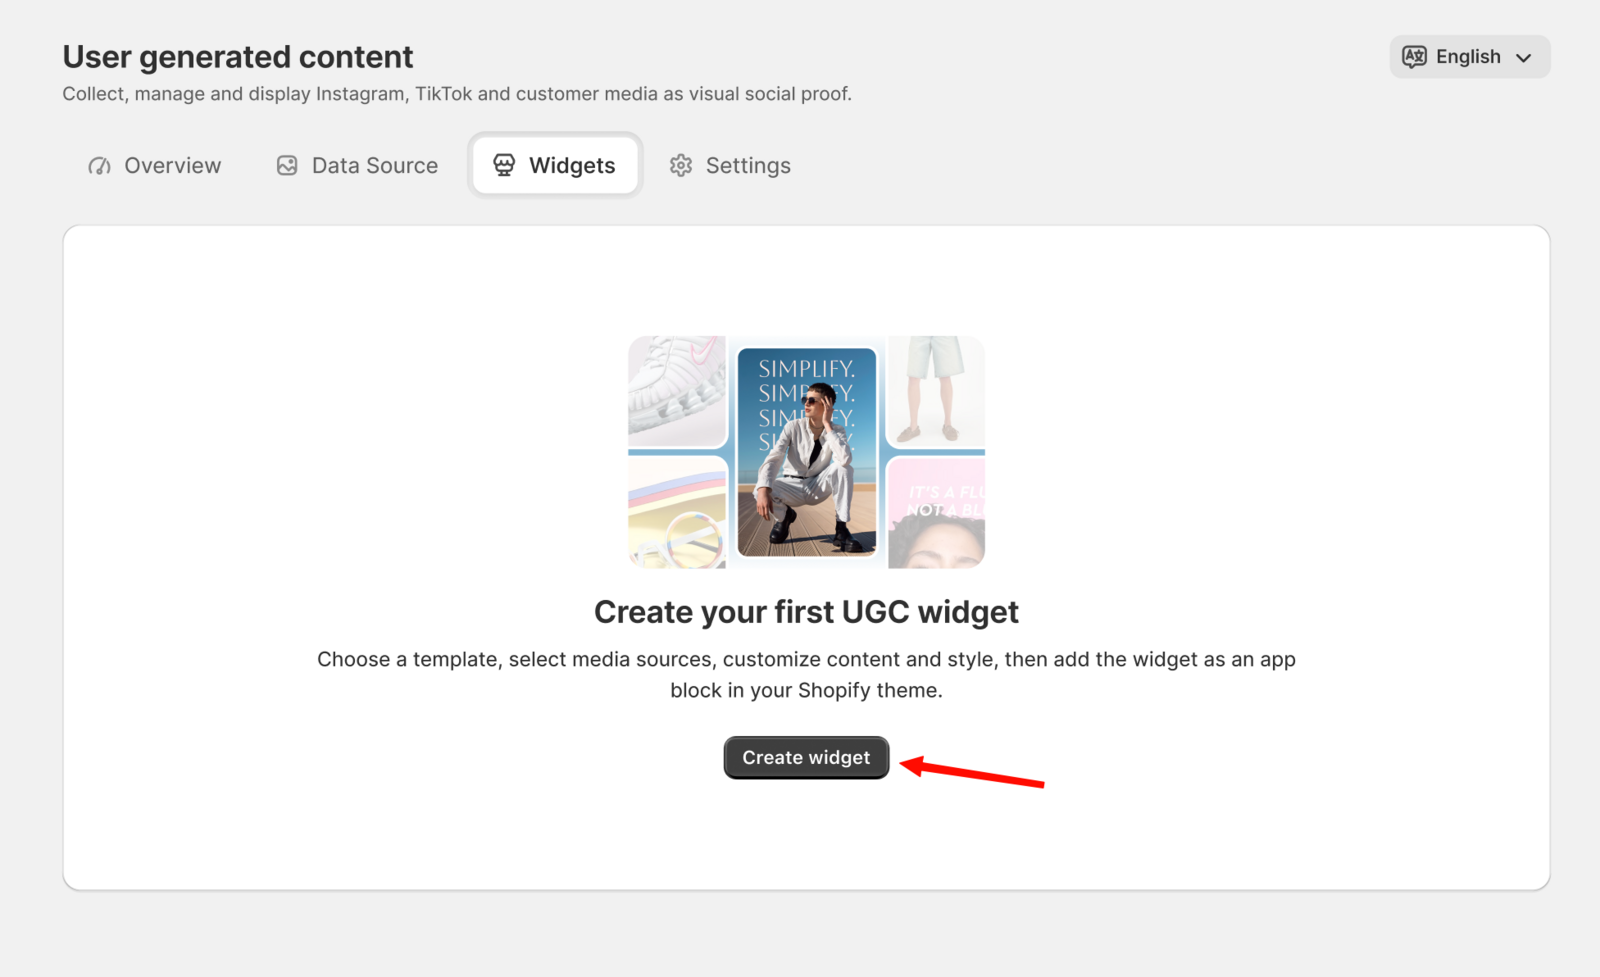
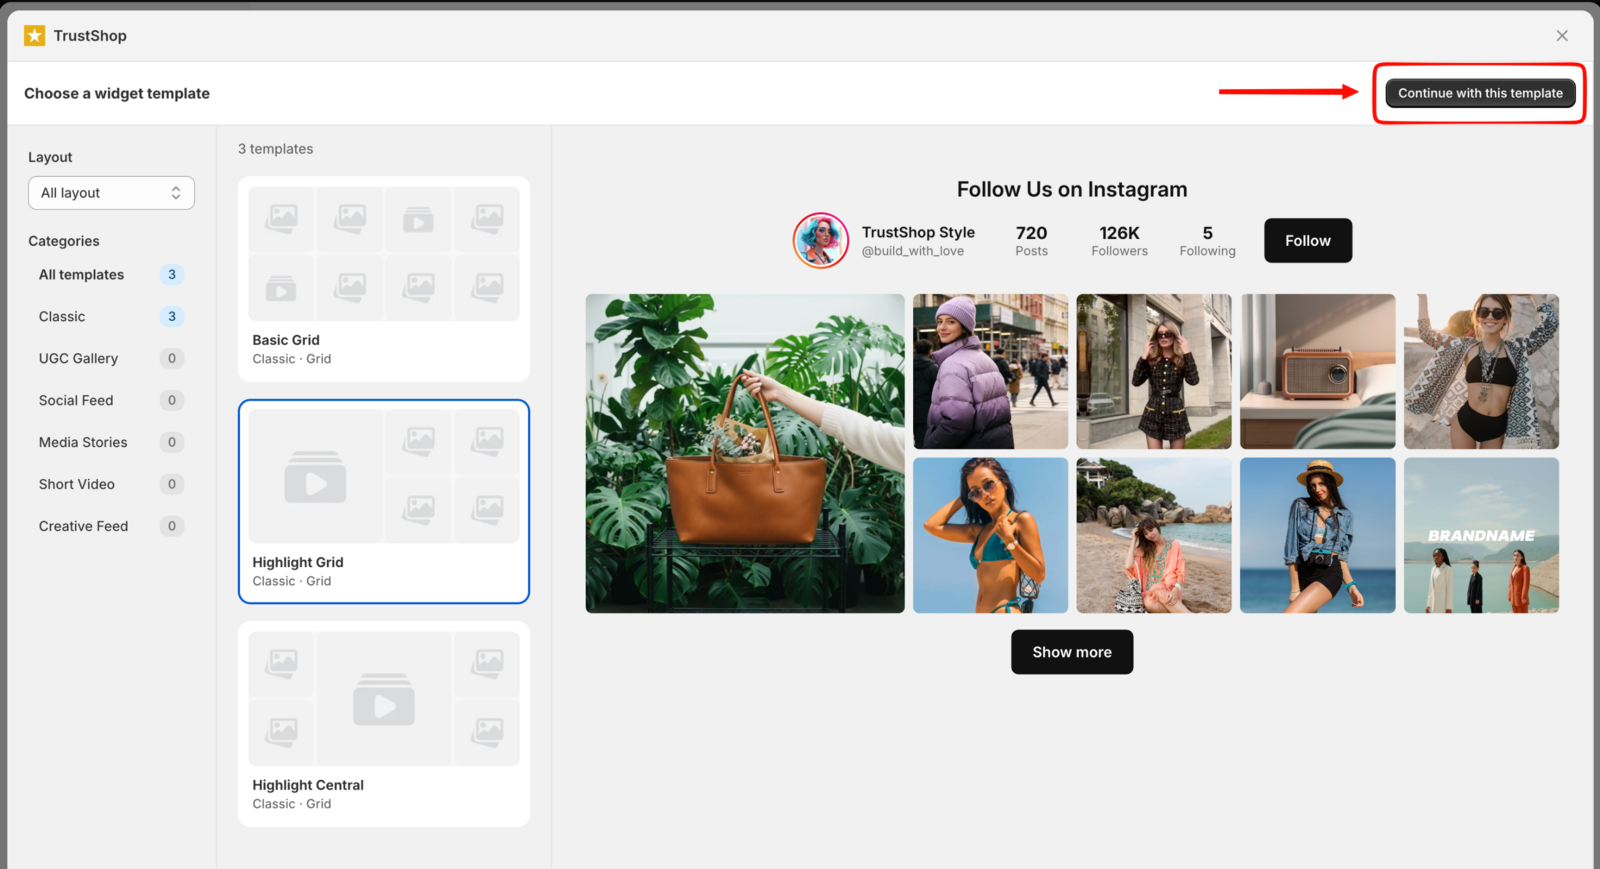
- Choose the template that fits where the widget will live (for example, a story-style row for the homepage).
- Configure it — pick the data source, content, settings and appearance options.
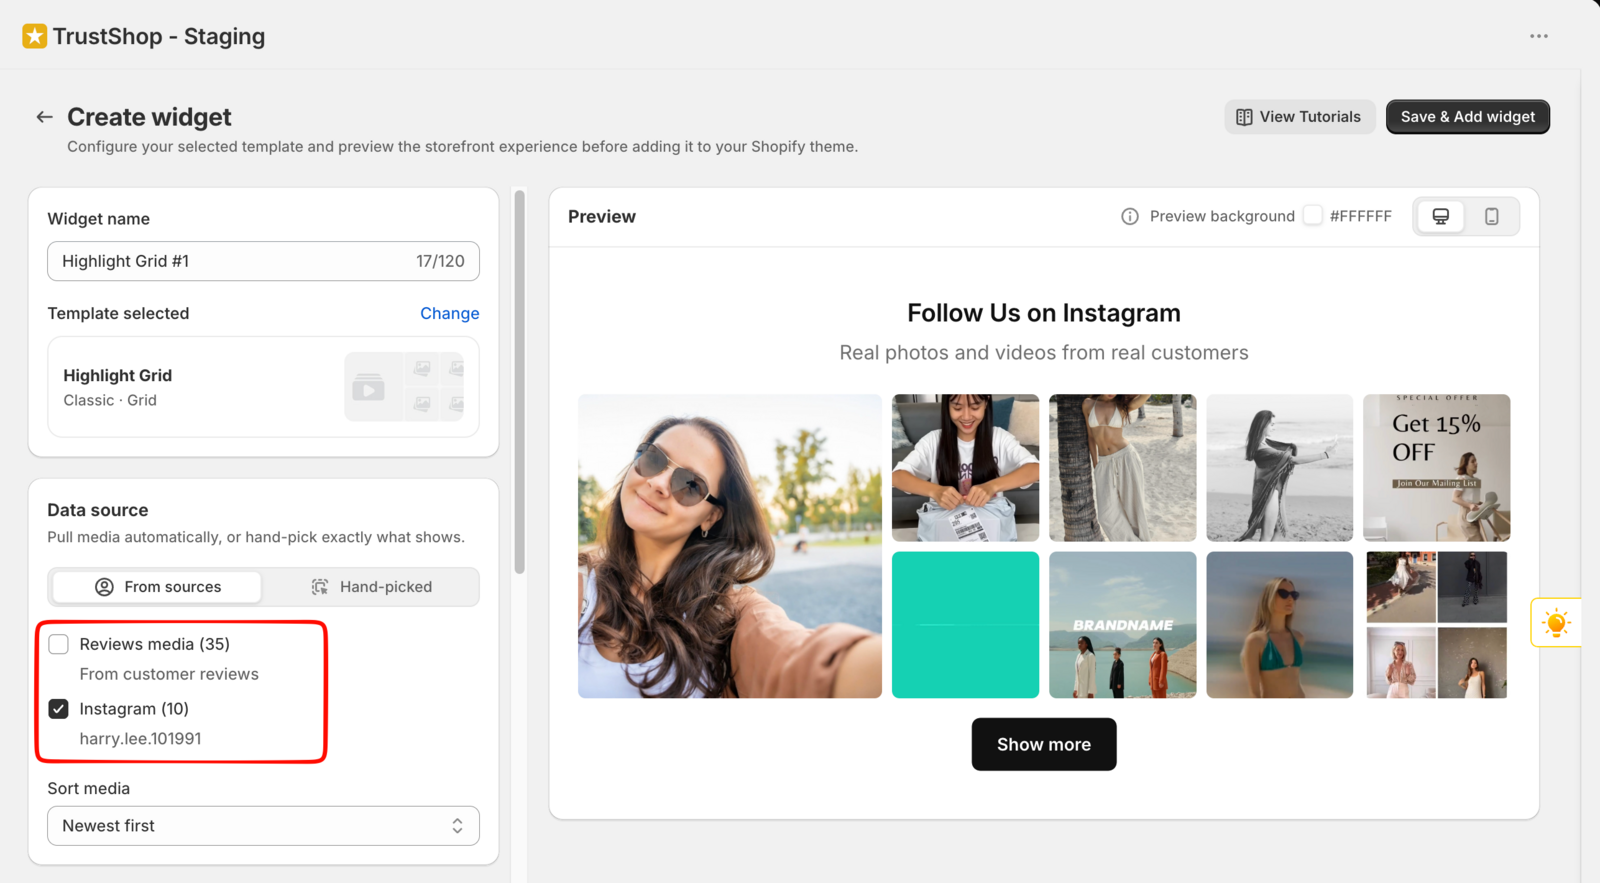
- Check the preview, then Save & Add widget.
TrustShop installs widgets through Shopify's theme app blocks, so nothing is injected into your theme code and nothing is left behind if you uninstall.
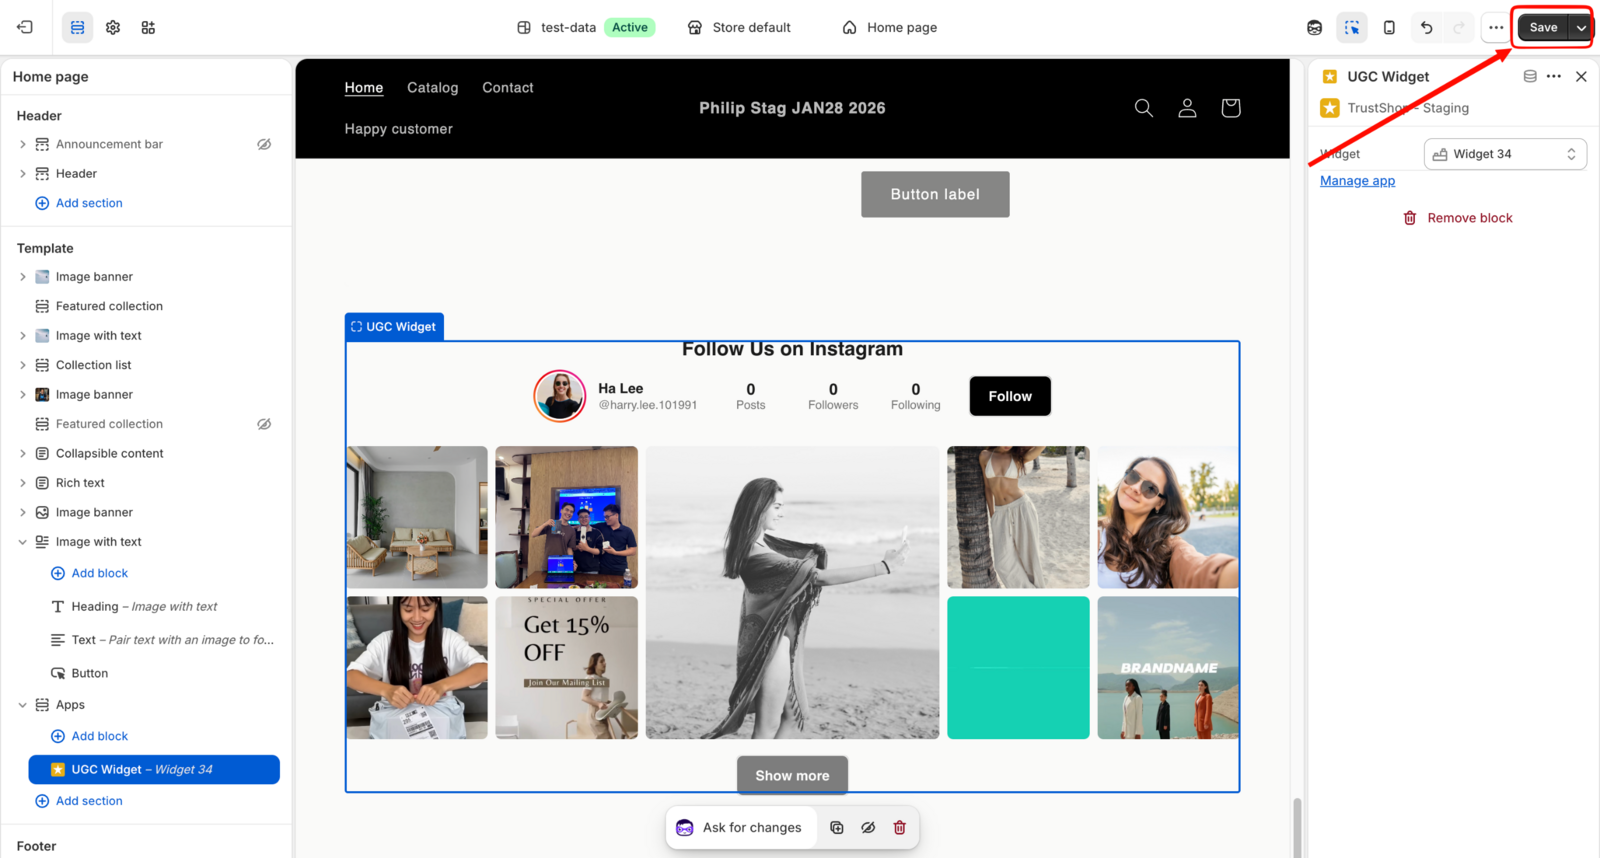
- From the widget, click Add to theme.
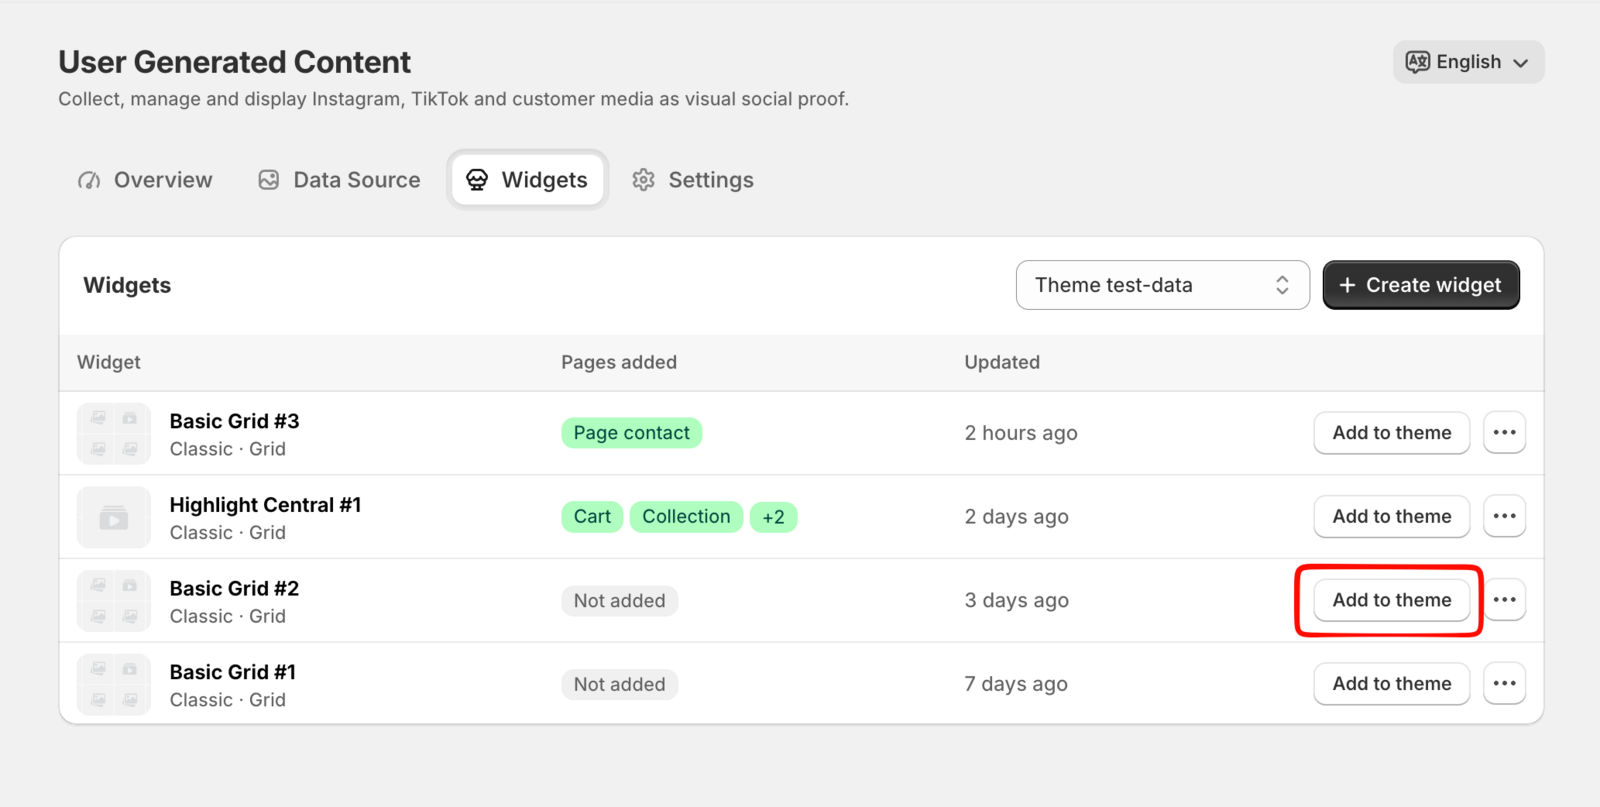
- In the modal, choose the theme and the page the widget should appear on.
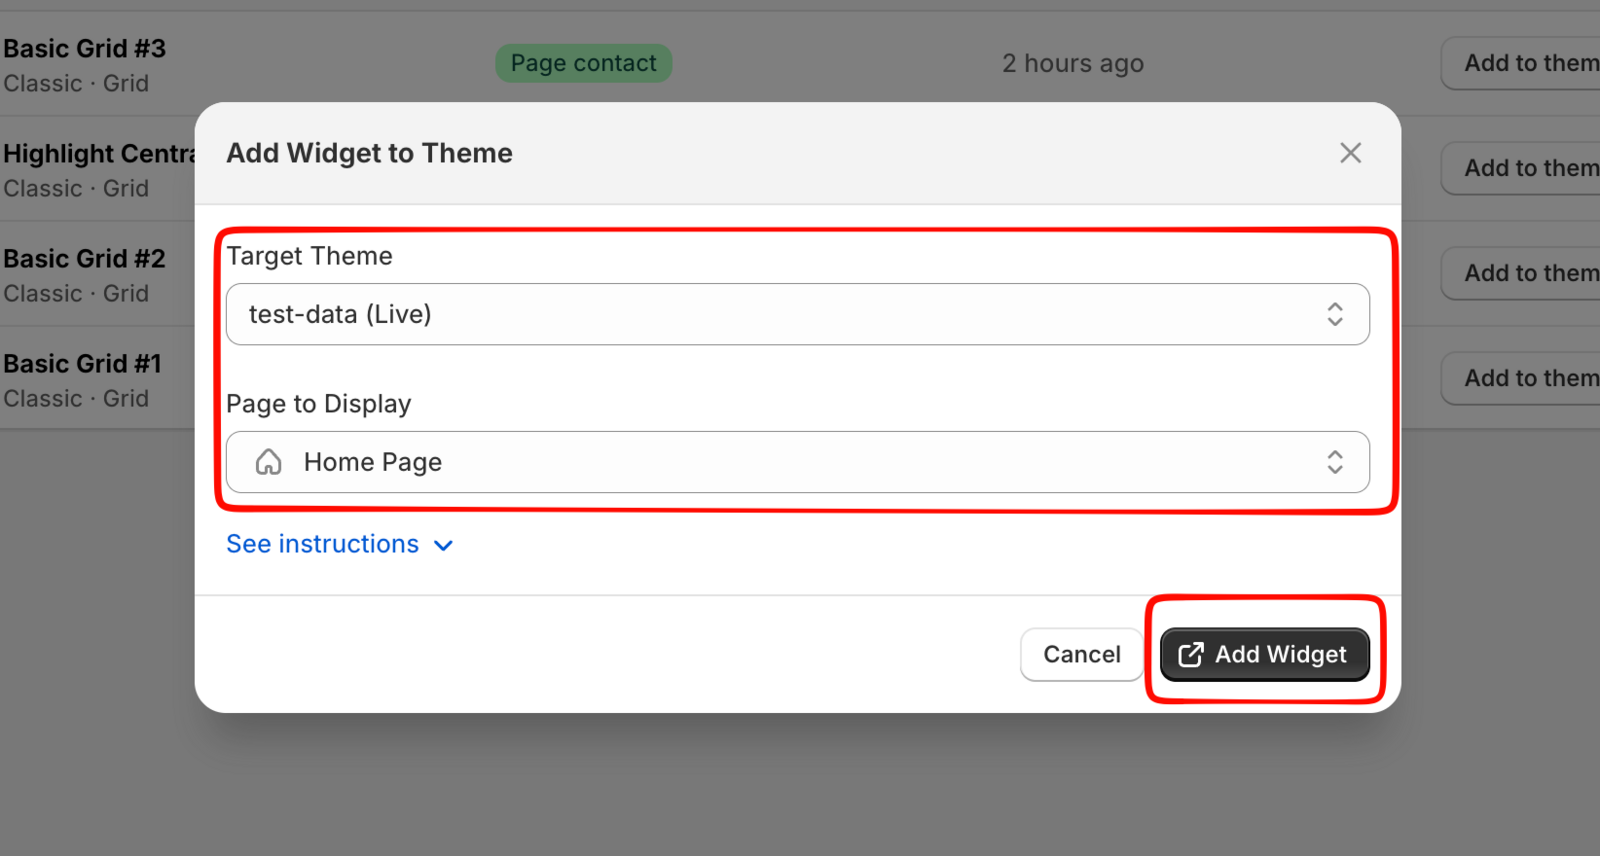
- You are redirected to the Shopify theme editor, where TrustShop has already added the block for you.
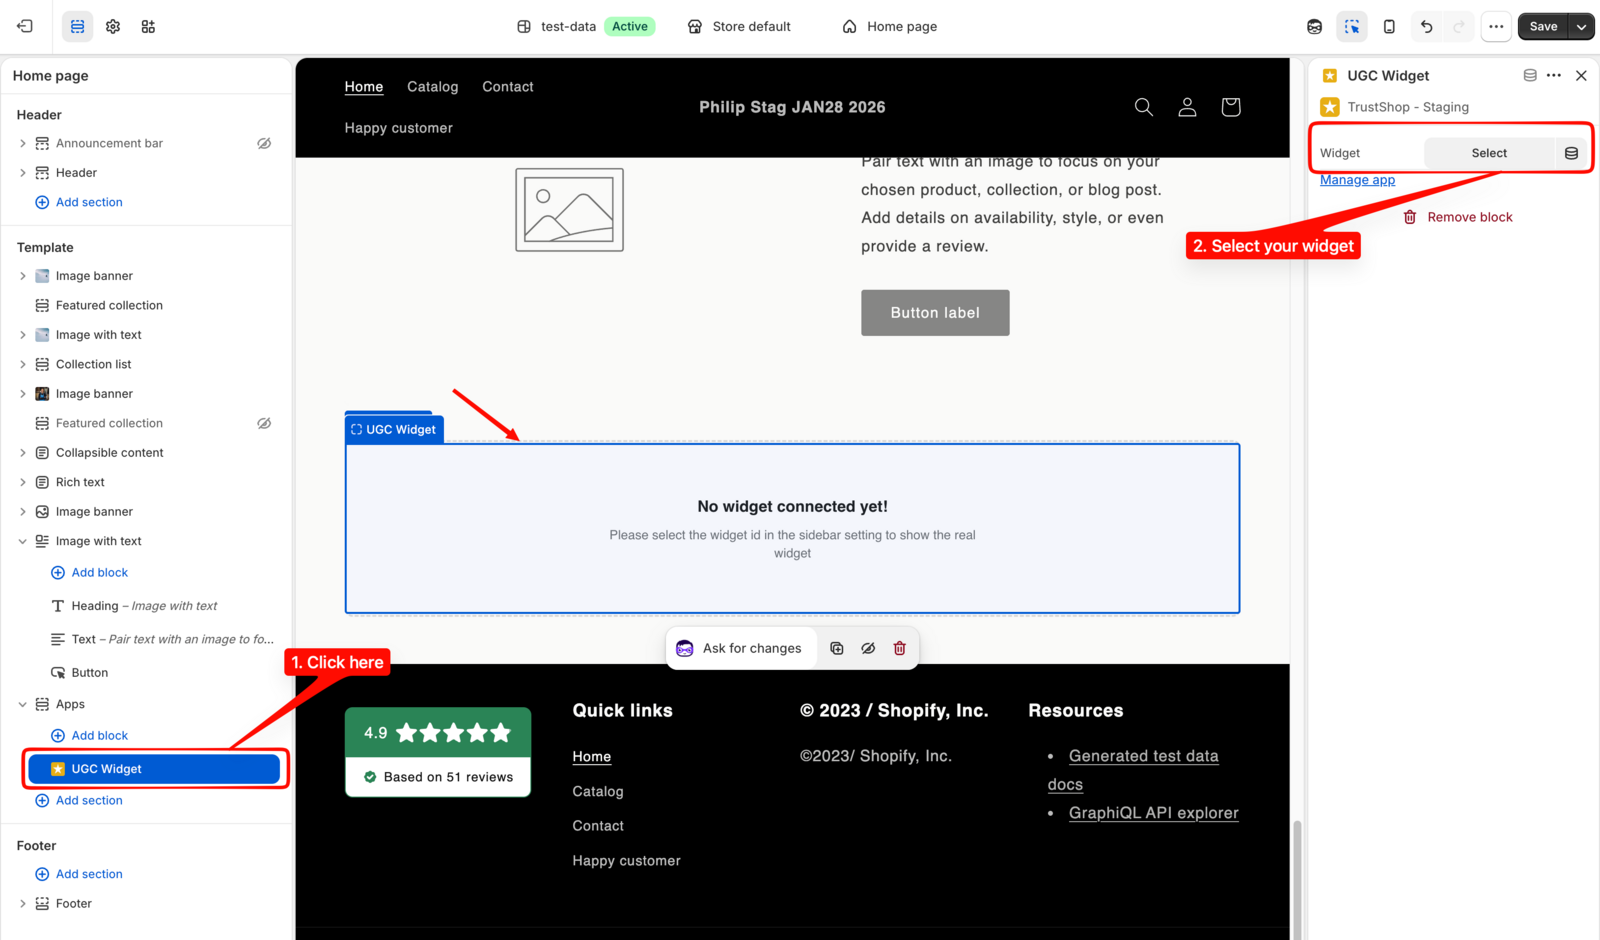
- In the block's settings, select the widget name you created.
- Click Save in the theme editor header.
Updated on: 11/07/2026