
Add Review Testimonial
For Theme 2.0
Step 1: Settings-> Widget-> Add widget
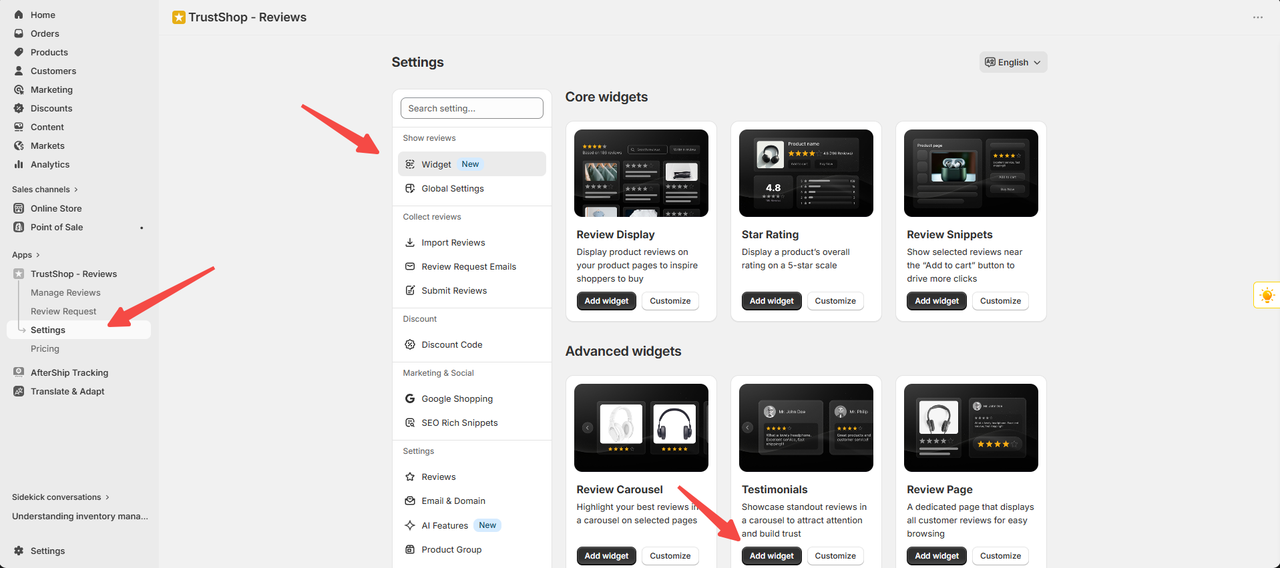
Step 2: Select the theme you want to add, the live theme is the theme you are public (for example add to the home page) - > Add widget.
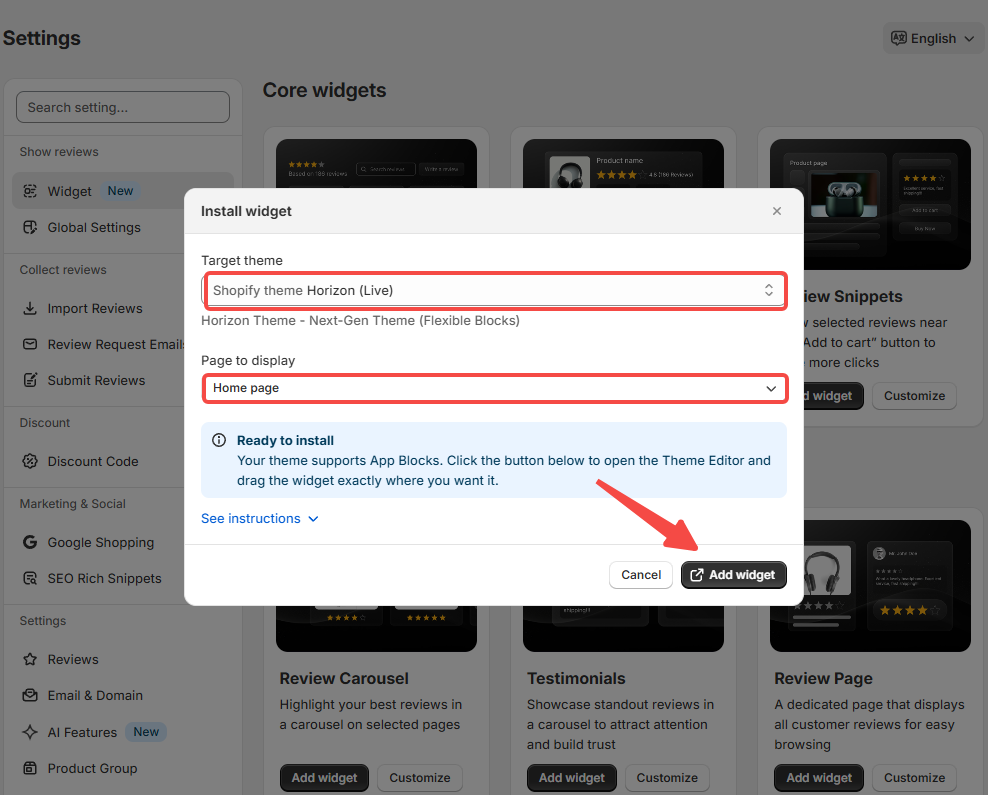
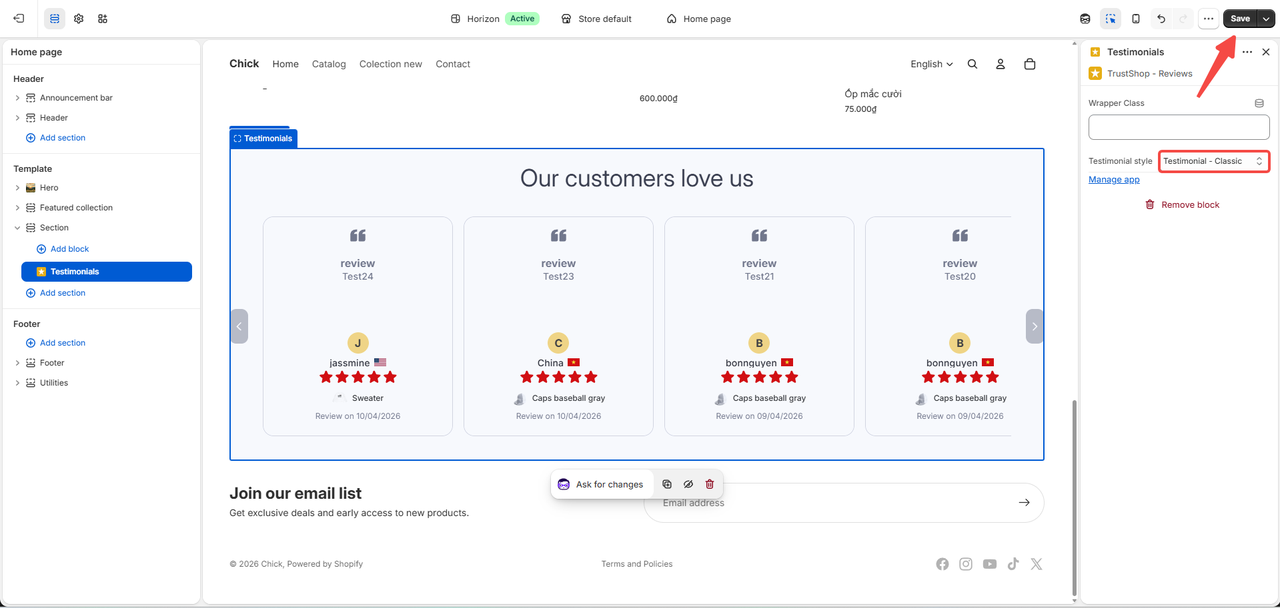
In the testimonial section, you can choose the style that you have customized according to your preferences. You can also grab and drag the extension to where you want as long as it is in the same section. Finally, click save.
Custom for widget
Testimonials come in 2 type:
- Testimonial - Classic
- Testimonial - Impact
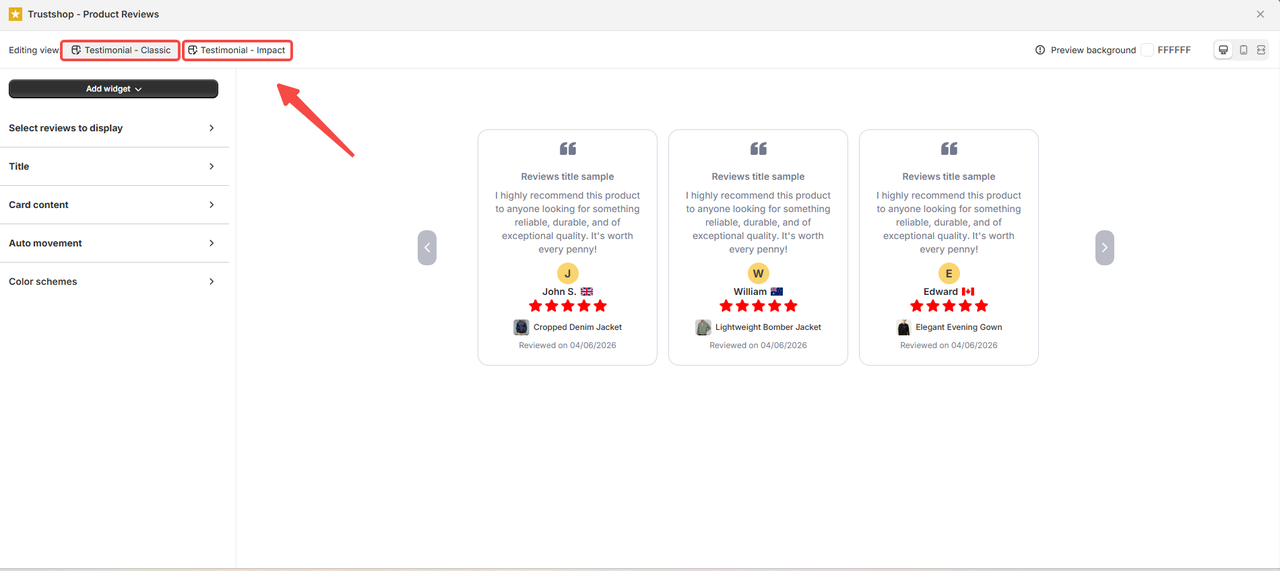
Once we have added the add-on, we can skip the add-on button here.
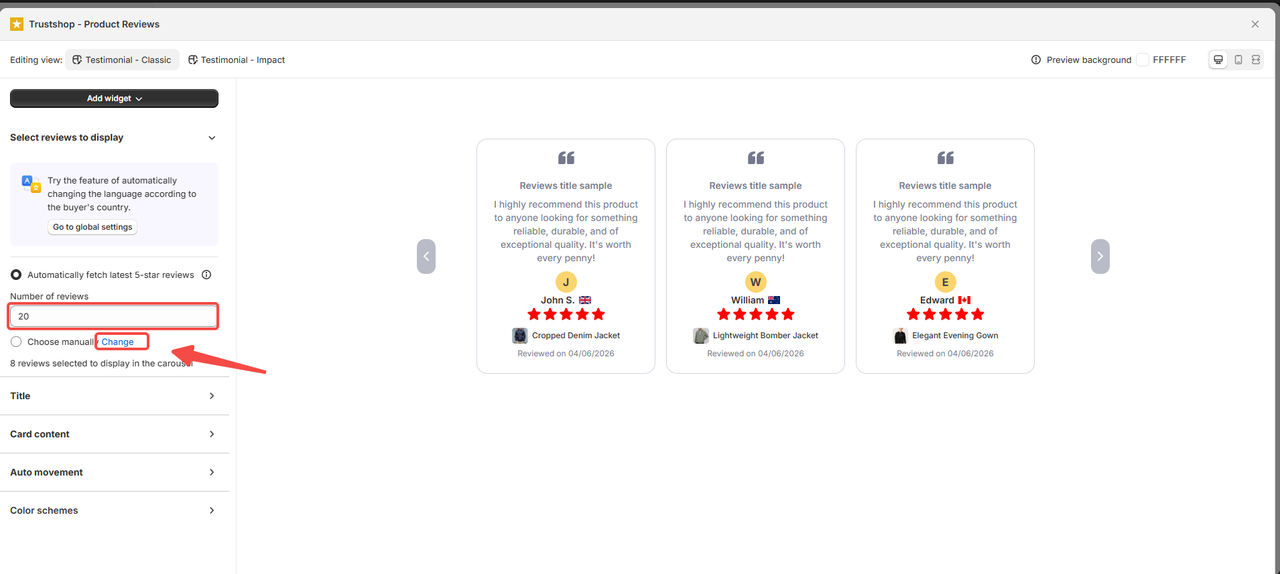
Select review to display:
- Automatically get the latest 5-star review (you can choose the number displayed on the carousel)
- Manually click change to select the reviews you want to display.
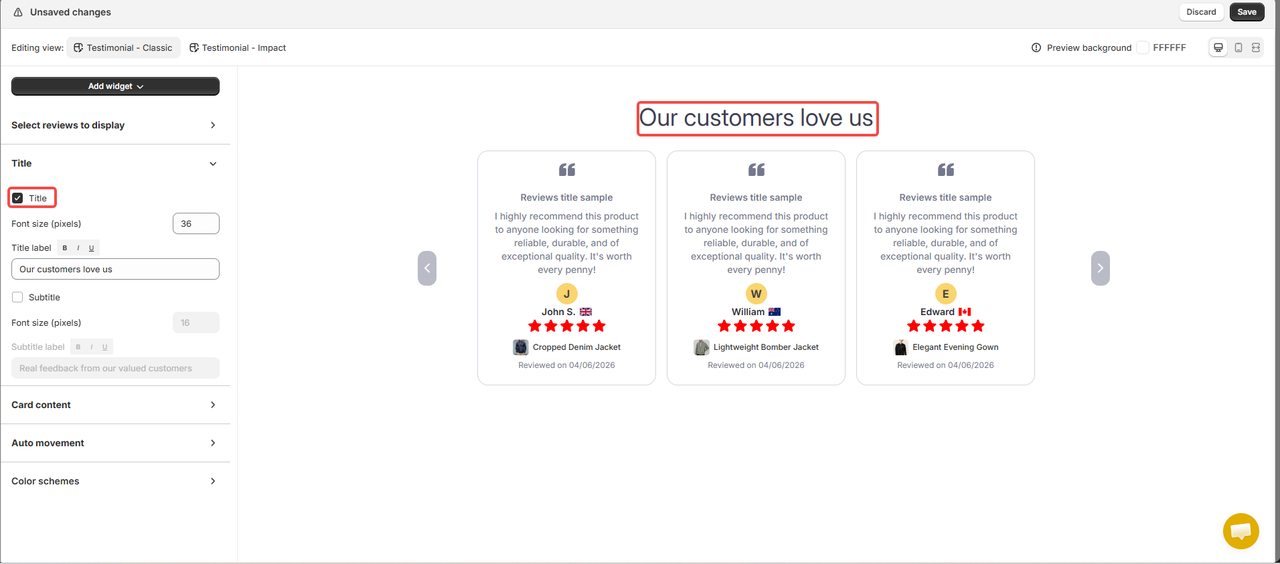
 Title section**: You can choose to hide or show the title, change the font style or underline the size of the text.
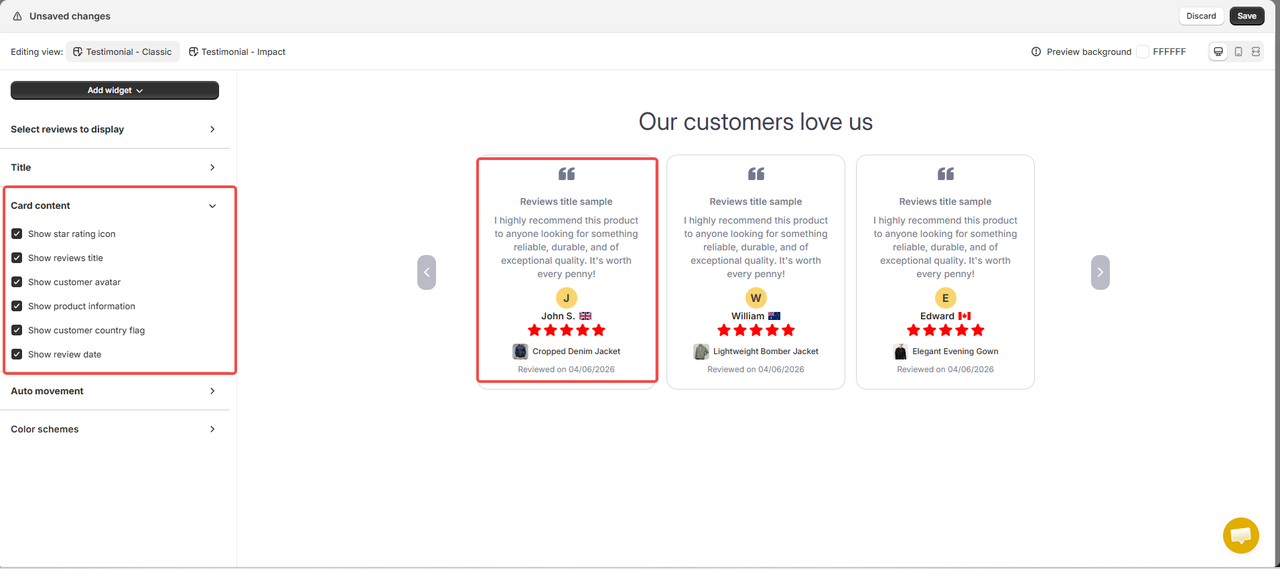
The card content: Display the information of the review such as country, date of review, product information,... You can still choose to hide or show this information.
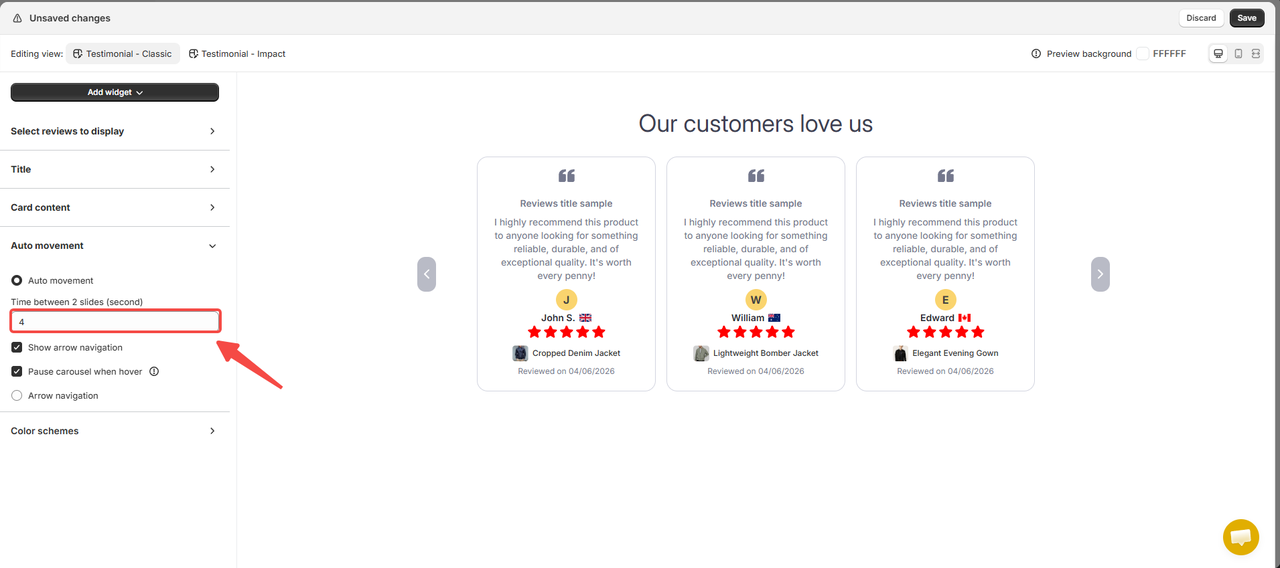
Phần Auto movement:
Automatic movement: when choosing automatically, you can adjust the movement time between 2 slides
Click the arrow to continue the review.
 lor schemes: Allows you to change the color of the information displayed in the widget
Configuration for Testimonials - Impact is similar to that of Testimonials - Classic. However, these settings are not inherited from those previously set up, so need to be reconfigured individually for each Testimonial - Impact block.
For Theme 1.0
Step 1: Settings-> Widget-> Add widget
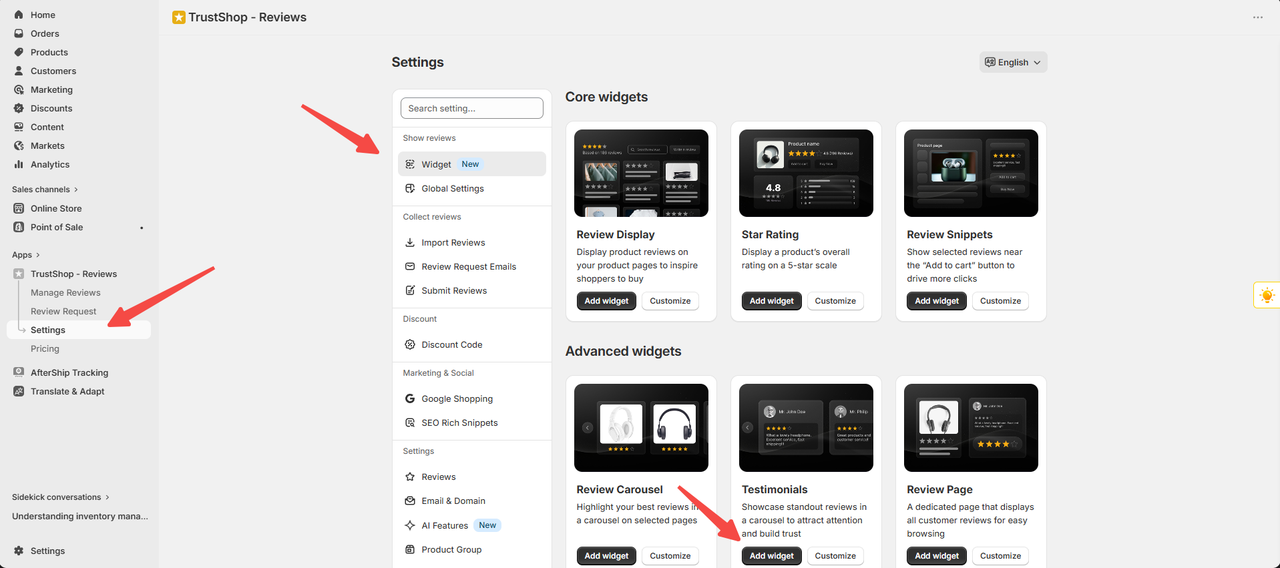
Step 2: Select the theme you want to add- > Open edit code
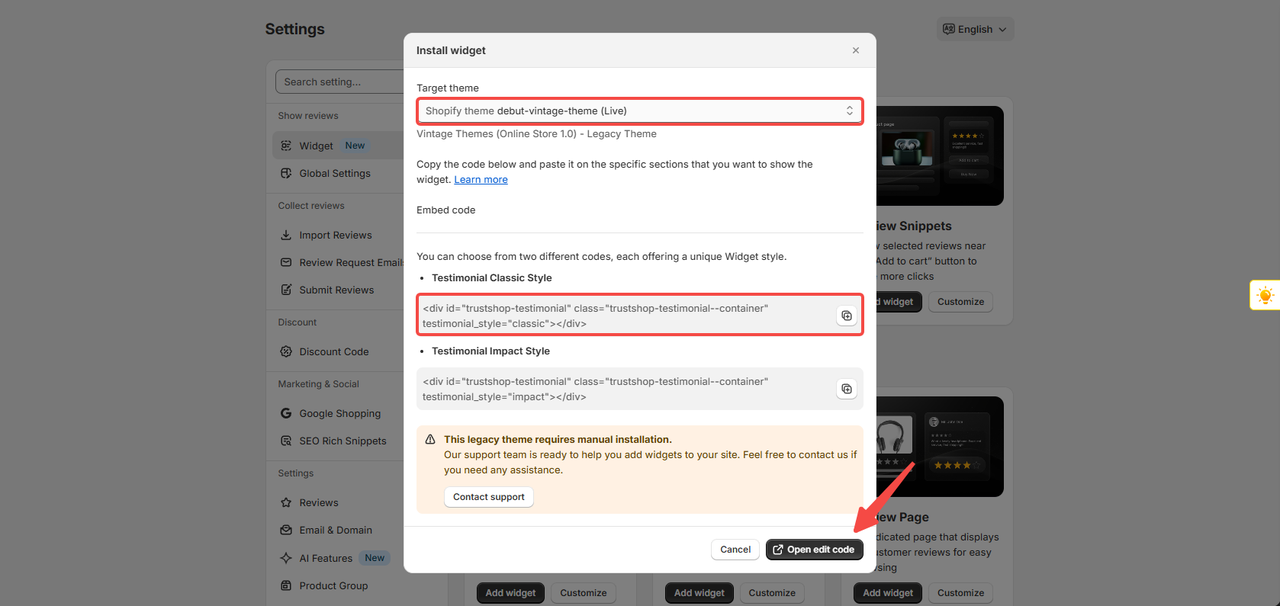
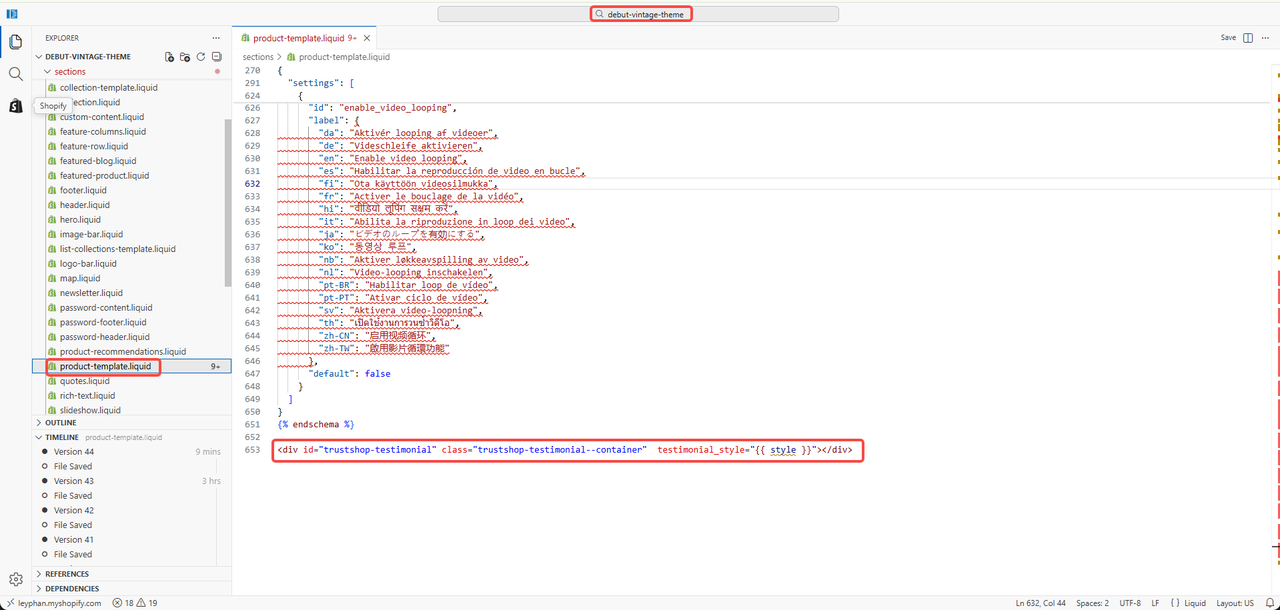
Find the file based on your theme and add the code
- On the Edit Code page, use the search bar at the top to find the file to which you will add the widget code. The file name may vary depending on the interface you are using.
- For example: I am currently using the Debut interface, so I will look for a file named
product-template.liquid - Open this file and paste the copied code at the end of the file.
- Click Save.
Updated on: 18/06/2026